DSP Vs Sonarworks Comparison: Room Correction Latency
By Jae Min Park • 17th May
If you're trying to choose between monitor DSP and Sonarworks for room correction, you're really asking two things at once: "Which is more accurate?" and "Will the latency get in my way?" This DSP vs Sonarworks comparison will walk you step by step through integrated vs external room correction so you can pick the lowest-stress option for your small room.
Place, isolate, then decide.
We'll keep it practical: minimal theory, clear measurements, and a simple decision path at the end.
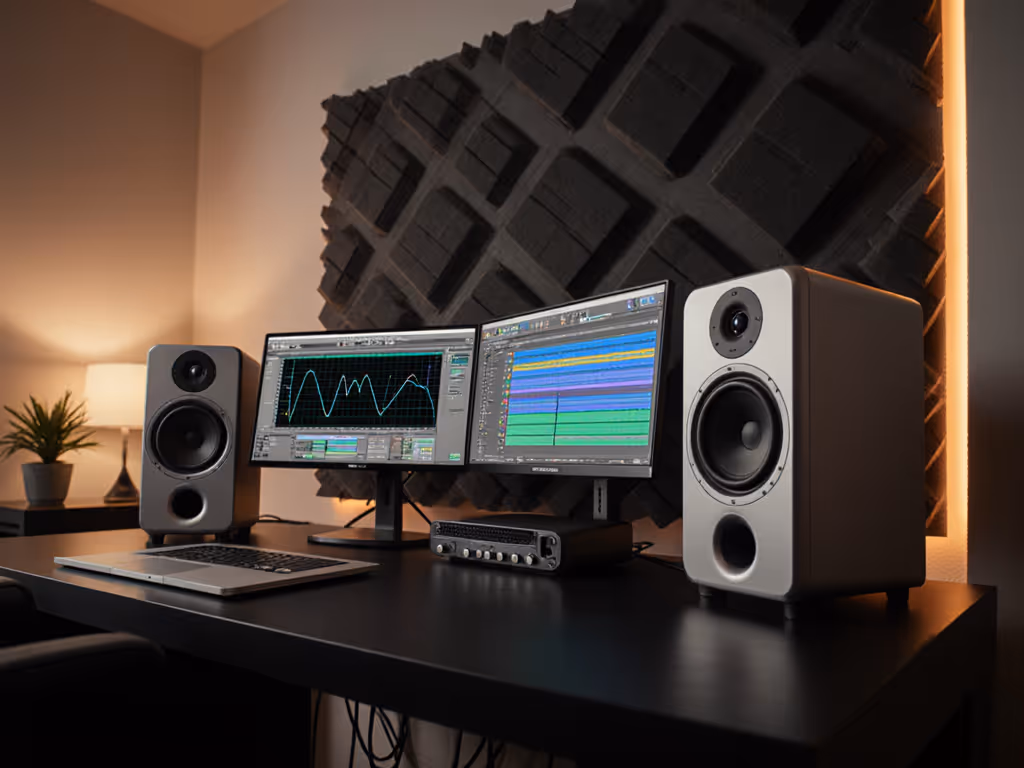
1. What We're Actually Comparing
Before digging into numbers, it helps to define the two sides.
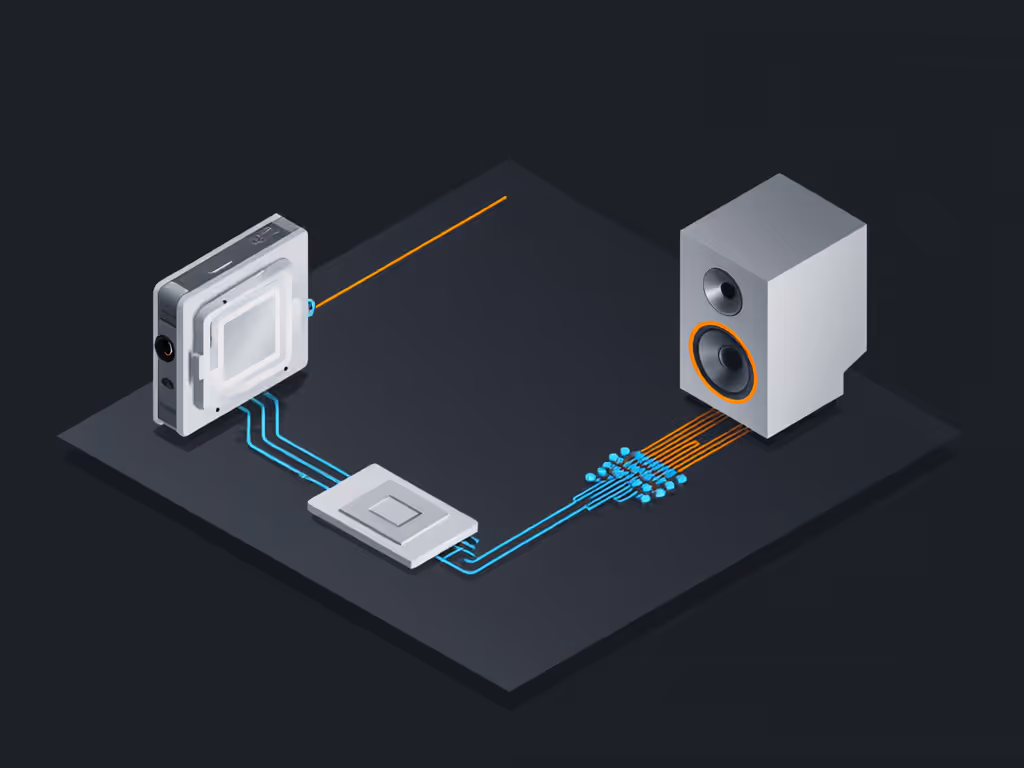
1.1 Integrated DSP room correction (inside the monitor or hardware box)
What it is:
- DSP built into your speakers (Genelec SAM, Neumann KH with MA 1, some Presonus, JBL, etc.), or
- A dedicated hardware box between interface and monitors (miniDSP, Trinnov, etc.).
Signal flow (simplified): DAW → Audio interface → (optional external DSP box) → Monitors (with or without built-in DSP).
Key traits:
- Runs on dedicated hardware, not your computer.
- Correction is usually applied before the analog output stage of the monitor.
- Latency is typically very low and fixed, designed to be "always on."
This is what I'll call integrated DSP in this article.
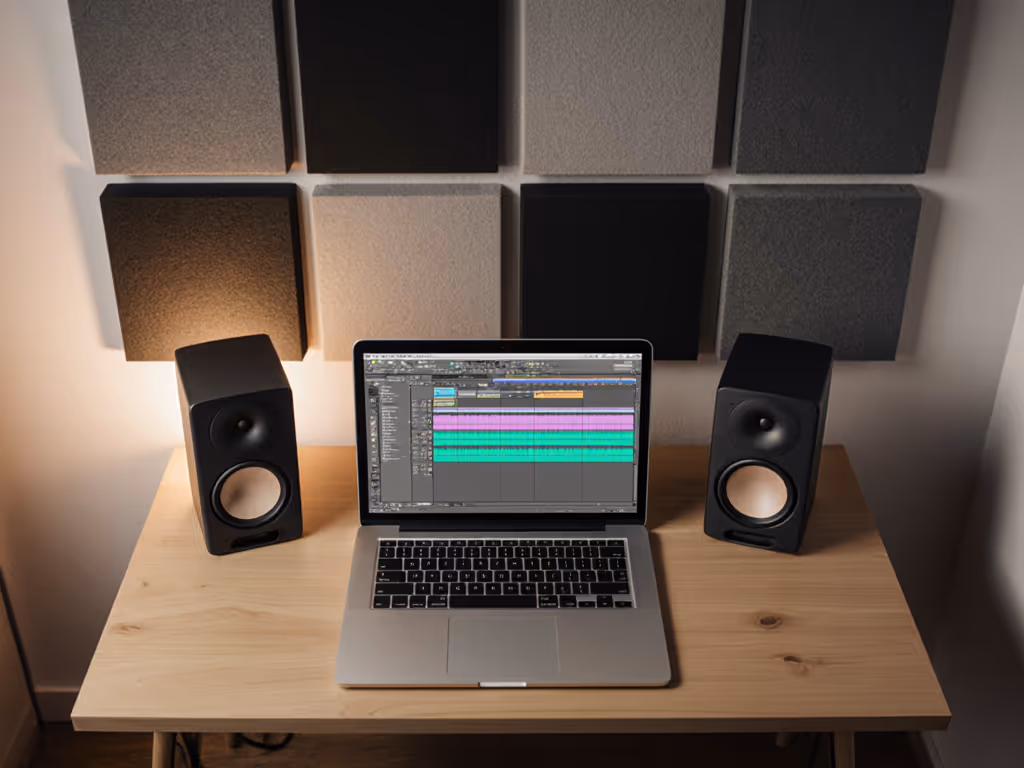
1.2 External software correction (Sonarworks SoundID Reference)
What it is:
- A plug-in in your DAW or a systemwide app that applies a corrective EQ/phase filter to your audio.
Signal flow (plugin): DAW tracks → Mix bus → Sonarworks plug-in → Audio interface → Monitors.
Signal flow (systemwide): Spotify/DAW/Browser → Sonarworks systemwide driver → Audio interface → Monitors.
Key traits:
- Runs on your CPU, not in the speaker.
- Very flexible: works with almost any monitor or headphone.
- Latency depends on sample rate, buffer size, and filter type.
This is the external software side of our Sonarworks vs built-in room correction comparison.
2. Step 1 - Fix the Basics Before You Compare Anything
Room correction is not a magic eraser. In small bedrooms, getting the basics right often cuts the problem in half before any software or DSP touches the signal.
I've seen students upgrade from cheap monitors to fancy DSP speakers, still fail every car check, then suddenly "get it" after we put the speakers on makeshift isolation (yes, tennis balls) and pulled the desk off the wall by 20-30 cm. The constant was simple: once the physical setup was stable, their decisions finally started to travel.
Use this quick checklist before you dive into latency numbers. For a deeper primer on setup basics, see our room placement and treatment essentials.
2.1 Placement checklist
- Speaker distance from wall:
- If rear-ported, start ~20-30 cm from the wall behind them.
- If front-ported/sealed, you can get a bit closer, but avoid touching.
- Triangle geometry:
- Distance between speakers ≈ distance from each speaker to your ears.
- In small rooms, that might be 0.8-1.1 m.
- Height:
- Tweeters at ear height or slightly below.
- Toe-in:
- Start with speakers aimed just behind your head, not at your nose.
2.2 Isolation checklist
- Decouple from desk:
- Use foam pads, rubber pucks, or even a DIY solution to stop the desk from acting like a drum.
- Stable stands or risers:
- Avoid wobbly stands; micro-movement changes imaging.
- Symmetry:
- Try to have roughly the same wall/furniture layout on both sides.
Set it right once; spend your energy finishing songs.
Once your basics are set, you're ready to make an honest latency comparison between integrated DSP and Sonarworks.
3. Step 2 - How Latency Actually Happens
Latency in room correction mostly comes from two things:
- Buffering:
- Audio is processed in blocks (buffers). Larger blocks = more time = more latency.
- Filter type and length:
- Complex filters (especially linear-phase) can add extra delay.
3.1 Integrated monitor DSP performance
Integrated DSP is usually designed to be "transparent" in time.
General patterns (numbers are typical ranges, not brand-specific promises):
- Monitor DSP only (no external box):
- Latency is often sub-millisecond or a few ms at most.
- It's fixed and the same all the time.
- Hardware processors (miniDSP, Trinnov, etc.):
- Can add anywhere from 1-10 ms depending on mode and filter complexity.
- Many offer low-latency modes for tracking.
Because this latency happens after your interface, you usually feel it just like acoustic delay from being a few extra centimeters away from the speaker. For most people at a desk, it's negligible.
3.2 Sonarworks latency behavior
Sonarworks works differently:
- It loads as a plugin or system driver, so its latency stacks on top of:
- Your interface buffer (e.g., 64, 128, 256 samples).
- Any plugin delay already in the session.
- Sonarworks uses fairly detailed filters. In many cases:
- Expect a few ms up to around 10 ms of plugin delay, depending on settings.
- Systemwide mode adds its own driver overhead.
In a mix-only workflow, this is usually fine. In tracking or live performance, it can become noticeable.
3.3 Mental model
Think of latency like sitting further from your speakers:
- 1 ms ≈ 34 cm (about 1.1 ft) of air distance.
- If your total monitoring path adds 10 ms, your brain feels like the speakers are about 3.4 m away.
Again, that's not a problem for mixing, but for tight timing on live instruments, it can be distracting.
4. Step 3 - Measure Latency in Your Own Setup
Instead of guessing, you can do a quick room correction accuracy testing and latency test in under 20 minutes.
4.1 Simple DAW ping test
You'll need:
- Your DAW
- An interface with at least one output and one input
- A short cable
Steps:
- Create a click track:
- Put a single sharp transient (like a rimshot or square wave click) on a track.
- Route out and back:
- Send that track to a spare output on your interface.
- Physically patch that output into an input with a cable.
- Record the loopback:
- Arm a new track and record the returning signal.
- Measure the offset:
- Zoom in and measure the distance (in samples or ms) between the original click and the recorded one.
Now repeat this process with different setups:
- A. No correction (baseline)
- B. Integrated DSP on (if you have it)
- C. Sonarworks plugin inserted on your master bus
- D. Sonarworks systemwide active
The difference between A and each other condition is the approximate latency added by that correction method.
If you don't want to do loopback tests, Sonarworks itself usually displays its plugin delay in the DAW (often in the plugin info or delay compensation readout). Compare that to what your monitor manufacturer or hardware DSP manual states. If you want a complete, low-cost measurement walkthrough, try our home studio calibration guide.
4.2 Decide what is "too much" for you
As a rule of thumb:
- 0-5 ms total monitoring latency:
- Feels tight for most tracking and playing.
- 5-10 ms:
- Many people still okay; some sensitive players will notice.
- 10-15 ms and above:
- Often distracting for rhythm-critical tracking.
When you combine interface buffer + plugin delays + correction, check whether you're creeping into that 10-15 ms zone while recording.
5. Step 4 - Accuracy: Flat Graphs vs Trustworthy Choices
Latency is only half the comparison. The other half is: which system helps you make better decisions in your room? For context on tonal balance targets, read our frequency response guide.
5.1 How integrated DSP typically behaves
Integrated systems (like GLM, MA 1, or monitor-specific apps) often:
- Use speaker-specific data (they know exactly how their speaker behaves in anechoic conditions).
- Apply correction mainly where the speaker deviates most or where the room causes big errors.
- Limit extreme boosts to avoid stressing drivers.
- Sometimes favor minimum-phase filters to keep latency and pre-ringing low.
Results in practice:
- Often very good low-mid cleanup and low-end control.
- Slightly more conservative at deep nulls where boosting doesn't really fix the room.
5.2 How Sonarworks behaves
Sonarworks is:
- Monitor-agnostic: works with many brands.
- Based on multi-point measurements around your listening area.
- Able to create detailed correction curves (much more than, say, a 10-band hardware EQ).
Results in practice:
- Very even overall tonal balance (e.g., smoothing a bright monitor or lifting a dull upper-mid region).
- Great for making headphones sound more like reliable references.
Because it's so powerful, it's easy to over-flatten:
- Chasing a perfectly straight line can make things sound a bit clinical or strange if your room is very small and reflective.
5.3 A simple way to do room correction accuracy testing
Use a free measurement tool like REW if you're comfortable, or trust your ears with a structured test:
- Pick 3-4 reference tracks you know extremely well.
- Listen in this order:
- No correction
- Integrated DSP only
- Sonarworks only
- Both together (just as a test, not a recommendation)
- Take notes on:
- Kick/bass consistency
- Vocal level and clarity
- Harshness or dullness in the 2-6 kHz region
- Stereo image stability as you move your head slightly
If one setup makes it dramatically easier to nail vocal level and low-end without surprise on headphones/car, that's the accuracy winner for you - even if its graph isn't the flattest.
6. Step 5 - Choose Based on Your Workflow (Not Just Specs)
Here's how I'd narrow the DSP vs Sonarworks comparison when latency and accuracy both matter.
6.1 If you record and play instruments live a lot
You likely care most about low latency while tracking.
Best fits:
- Integrated DSP only for speakers.
- Use Sonarworks only on headphones, or as a mix-only plugin you bypass while recording.
Why:
- Monitor DSP gives you consistent correction with almost zero impact on performance.
- You avoid piling plugin delay onto an already tight tracking buffer.
6.2 If you mainly mix/edit and rarely track live
You're more tolerant of a bit of delay, as long as editing is responsive.
Best fits:
- Sonarworks systemwide or plugin on your mix bus.
- Integrated monitor DSP if you have it (but usually pick one main correction in the speaker domain or Sonarworks, not heavy both).
Why:
- A few extra ms won't matter while automating vocals at 70 dB SPL.
- You gain flexibility (different target curves, headphone profiles, etc.).
6.3 If you're on headphones a lot (neighbors, late night)
Headphones are where Sonarworks shines.
Best fits:
- Sonarworks headphone profile + very light or no speaker correction.
- Use integrated DSP mainly to fix major desk/room issues for occasional speaker checks.
Why:
- DSP inside monitors does nothing for the headphones you actually use most.
- Sonarworks can get headphones much closer to "neutral" for late-night work.
7. Example Setups You Can Copy
To make this concrete, here are three simple setups you can use as templates.
7.1 Budget bedroom with non-DSP monitors + Sonarworks
Gear pattern:
- Basic 5-7" monitors without built-in DSP.
- Audio interface.
- Sonarworks with measurement mic.
Workflow:
- Do basic placement and isolation (triangle, distance from wall, pads).
- Measure with Sonarworks and create a profile. For step-by-step help, use our Sonarworks calibration walkthrough.
- Use:
- Systemwide correction for Spotify/YouTube.
- Plugin on your mix bus when mixing.
- For tracking vocals/guitar:
- Bypass Sonarworks plugin.
- Work with a low buffer (64/128 samples) for comfort.
Latency is only a concern while recording, which you avoid by bypassing the plugin.
7.2 DSP monitors + occasional Sonarworks check
Gear pattern:
- Monitors with built-in DSP + matching calibration mic/software.
- Audio interface.
- Sonarworks (no need for speaker measurement, just for headphones later if budget is tight).
Workflow:
- Run the monitor's own calibration and store it in the speakers.
- Treat this DSP as your always-on baseline.
- Use Sonarworks mainly for:
- Headphone correction when you need to work quietly.
- As a secondary tonal check on speakers with a gentle "tilt" curve, if desired.
You get very low latency from the monitors and keep your session simple.
7.3 Hybrid: Small DSP box + Sonarworks
Gear pattern:
- Interface → Small hardware DSP (miniDSP/ARC Studio) → Any monitors.
- Sonarworks.
Workflow:
- Use hardware DSP to do broad speaker/room shaping with minimal latency.
- Use Sonarworks for fine tonal shaping or headphone work, but:
- Don't try to fully "re-flatten" what your DSP already did.
- Keep Sonarworks curves gentle to avoid double-correcting.
This is a flexible but more complex path. I only suggest it if you like to tinker.
8. Common Pitfalls to Avoid
To keep your setup stable and trustworthy, watch out for these:
8.1 Double correction
- Running monitor DSP + Sonarworks with full, aggressive curves can overcook the sound.
- If you combine them, make one of them subtle:
- Example: Monitor DSP handles low-end; Sonarworks only adds a gentle tilt or small mid corrections.
8.2 Forgetting the export/bounce path
- If you use Sonarworks as a plugin:
- Keep it last on the master bus.
- Bypass or remove it before bouncing your final mix.
- If you use systemwide mode:
- Your DAW bounce is usually unaffected, but real-time external recording could capture the corrected signal.
Know exactly where correction lives in your signal chain.
8.3 Tracking through high-latency correction
- Recording vocals or instruments with Sonarworks active at a high buffer (256/512) can feel "laggy".
- Simple routine:
- Tracking phase: correction off (or only hardware DSP).
- Mix phase: correction on.
Once you build this into your habit, it stops being a mental burden.
9. Bringing It All Together
Here's the distilled takeaway from this DSP vs Sonarworks comparison:
- Integrated DSP:
- Best for low-latency, always-on room/speaker correction.
- Great if you track a lot or want a "set and forget" monitor behavior.
- Sonarworks (external software):
- Best for flexible tonal shaping, headphone correction, and working with any monitor brand.
- Latency is acceptable for mixing, but you may want to bypass it while tracking.
Place, isolate, then decide: get your speakers in a stable, honest position, then choose the simplest correction chain that lets you forget about the tech and focus on decisions.
If you're unsure which way to go next, here's a gentle path of further exploration:
- Spend one weekend just on placement and isolation.
- Measure or at least listen critically to your current setup with 3-4 references.
- Try one correction method at a time (integrated or Sonarworks), and live with it for a week.
- Only then consider adding a second layer (e.g., headphone correction) if a specific problem remains.
Set it right once; spend your energy finishing songs.
Related Articles